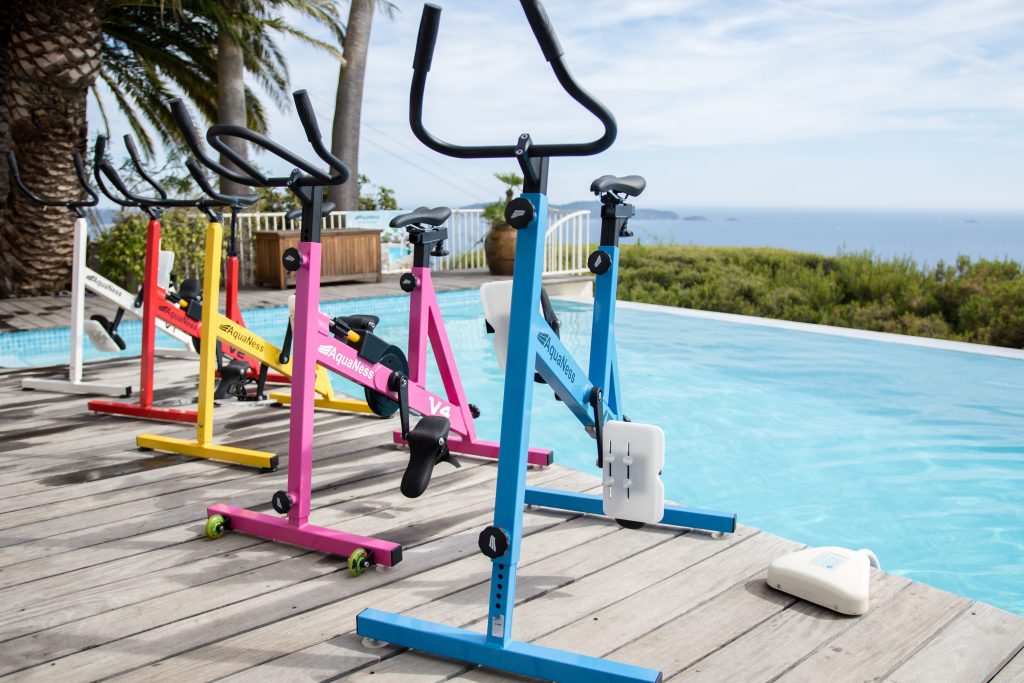
If you’re planning to set up an aquabike for home use, therapy, or fitness classes, you’re in the right place. Our different models have their little quirks but don’t worry, setting them up is easier than it sounds. In this guide, we will take you through the basics and give model-specific tips for V1, V2, V4, and V5 so you can get riding fast and safely. Let’s get started!
Process of Setting Up Different Aqua Bike Models in Your Pool
Here is step by step guide on how you can install and set up your aquatic bike you buy from us:
Pick the Right Spot in the Pool
All Aquatec bikes, V1, V2, V4, and V5, need a minimum water depth of about 1.1 meters. Choose a flat area in your pool that’s stable and away from slopes or drains. If your pool floor is smooth, models V2, V4 and V5 come with suction cups to hold firm. On the other hand, our V1 models have plastic cups under each leg for pool protection and basic grip.
Assembling the Frame
All four models come with a very detailed assembly manual. The aquabiles come semi-assembled. Just follow the included manual. In summary:
- Attach the legs to the main frame.
- Add the seat and handlebars.
- Fix the pedals and resistance if relevant.
- Tighten all bolts firmly.
Tip: Models V4 and V5 are quicker to set up. Why? Because they come with adjustable frames that are designed for easier handling, faster fitting and adjustement.
Adjust the Height and Position
Generally speaking, if you plan on sharing the bike with others or need specific postural support, go for V4 or V5. Here’s where the models differ a bit, so let’s keep it easy:
- V1: Simple design, great for general use and rehab. You can set the handlebar and seat height before the bike goes into the pool. It is good if you don’t have to adjust it in between the exercise sessions.
- V2: Adds more flexibility. You can adjust the resistance during training, which is ideal if you want more intensity as you go.
- V4: Like V2 but smarter. It includes an adjustable frame, so you can fine-tune your seat forward/backwards, handlebar height, and even overall bike height. It is great for different user heights and postures.
- V5: This one gives you the best of both V1 and V4. It has a surface resistance like V1 but has an adjustable frame and easier setup like V4. It also comes with more comfortable pedals.
Move the Bike into the Pool
It is important to note that while moving the bike into the pool, never drag it across the pool surface to avoid scratching the frame. Once your adjustments are done, here is what to do next:
- Lift it slightly into the pool.
- Lower it down slowly, making sure all feet or suction cups are flat on the floor.
- Press down on the legs to make sure the suction or cups are gripping properly.
Final Check Before You Ride
Before your first session:
- Make sure all bolts are tight.
- Check that the pedals rotate smoothly.
- Confirm the bike is stable by gently shaking it.
Bonus Tip: If you’re using V2 or V4, test the resistance feature in the water. V2 and V4 use a regular braking system, and you can adjust resistance mid-session.
Quick Comparison: Which Model Suits You Best?
| Model | Best For | Key Feature | Resistance | Frame Adjustability | Notes |
| V1 | Rehab, beginners | Surface resistance | Before workout | Fixed | Simple, lightweight |
| V2 | Fitness training | Mid-workout resistance | Adjustable in water | Fixed | Great for progress tracking |
| V4 | Multi-user, precise fit | Full frame adjustability | Adjustable in water | Yes | Easiest to customize |
| V5 | Rehab + flexibility | Adjustable frame + comfort pedals | Before workout | Yes | V1’s resistance with V4’s frame |
Final Thoughts
Each aquabike is built for specific needs. If you’re just getting started or using it for rehab, V1 or V5 are solid choices. If you want to level up your cardio or interval training with real-time resistance control, V2 or V4 will serve you better.
Either way, setup is simple, and fast, and once you’ve done it once, you’re ready for a smooth, low-impact workout every day. For more details regarding any of our models or want to know how to set it up, contact us. Our expert team will guide you through every process and query.


